Archive for homebrew

Keg and Barrel Home Brew Supply gets a New Location

Posted in Brewing, Daily Pictures with tags , , on March 12, 2014 by Verge

While I was away at the Super Bowl, the owners of the store I work in, Keg and Barrel Home Brew Supply,  decided it was finally time to move out of the Berlin Mart and into a bigger and better location.  It’s only a mile or so away, and it’s going to be a lot nicer.  I wasn’t gone for very long, but sometimes things seem huge when you’re not around to see them change slowly.

Here are pictures from last week while the new location was still under construction, and a bunch from Monday, when we moved the bulk of the merchandise out of the old and into the new.  You should be able to tell which one is which, I hope!

This slideshow requires JavaScript.

Advertisement

The Sixth of August, Two Thousand and Thirteen – Barley Legal Home Brewers visit the new Flying Fish Brewery

Posted in Barley Legal Home Brewers, Brewing, Daily Pictures, Good Times with tags , , on August 7, 2013 by Verge

This month’s home brewers’ meeting was graciously hosted by our friends at Flying Fish Brewery at their brand new, amazingly eco-friendly site in Somerdale, NJ.

Big Brew Day 2013 – Barley Legal Homebrewers

Posted in Barley Legal Home Brewers, Brewing, Good Times with tags , , on August 1, 2013 by Verge

Another great time at Iron Hill with my home brew club, brewing hundreds and hundreds of gallons of fine homebrew.  I got a hell of a sun burn.  I’ll have to try to remember the sunscreen next year.  (photos courtesy of Larry Wagstaff)

Pour A Palooza – Barley Legal Home Brewers @ The Pour House – July 27, 2009 – Westmont NJ

Posted in Brewing, Daily Pictures, Friends and Family, Good Times with tags , , on July 29, 2013 by Verge

Well, that was a little crazy, and a lot of fun.  Check out the animated photos, and the panoramas.  Another great weekend event with my brothers and sisters from Barley Legal Home Brewers.

Cleaning the Barley Legal Jockey Box

Posted in Barley Legal Home Brewers, Brewing, Brewing and Kegging Step-By-Step Instructions with tags , , on July 22, 2013 by Verge

After NHC, and a party at Devin’s house on Saturday, and a solid showing at a Benefit we volunteered at, the club jockey box seemed to need some upgrades and modifications.

20130722_201257

was a moldy canvas bag, but our spare parts are now in a handy, dandy tool box.

20130722_201503

tagged that mo fo with the classic BL logo

20130722_203226

stripped down all the faucets and disconnects to be soaked in some BLC

20130722_203241

the box itself needed plenty of love, and so I broke all this down to the basics.

20130722_203851

flushed all the lines out and scrubbed off the “grime” from the inside.

20130722_222047

this is all the parts post scrubbing, and rinsed.

20130722_222607

god damn, I’m fucking OCD. You want something cleaned and organized???? loan that shit to me for a weekend!

Photos From AHA National Homebrew Conference in Philadelphia – Barley Legal Homebrewers

Posted in Barley Legal Home Brewers, Brewing, Vacations with tags , , , on July 9, 2013 by Verge

Videos from AHA National Homebrew Conference in Philadelphia 6/31/2013 Barley Legal Homebrewers Win the Golden Urinal

Posted in Barley Legal Home Brewers with tags , , , , on July 3, 2013 by Verge

While I wait to upload all the pictures from the past weekend, and explain what the hell they are all about, enjoy these videos of my brothers and sisters in Barley Legal Homebrewers enjoy the taste of victory from the coveted Golden Urinal.

The Fifteenth of May, Two Thousand and Thirteen

Posted in Barley Legal Home Brewers, Daily Pictures, Good Times with tags , , , on May 16, 2013 by Verge
IMAG0341

After work, I met up with a few of the members of Barley Legal Home Brewers to work on our seriously amazing serving booth that was built for National Homebrew Conference, but is being test run this weekend at Yardley Beer Fest. Here, fellow member John Companick is  cutting out custom font letters to be wired up with lights like the one in the background near the shed, and hung over the saloon doors.

IMAG0336

Meanwhile, President Evan Fritz hooks up the tubing that will serve delicious homebrew to the thousands of thirsty attendees at both events.

IMAG0337

And this was my contribution – hooking up all the tubing for the CO2 manifold that will push all that beer out to the crowds.

IMAG0338

Another shot of the rough side of the serving facade, with head designer and fabricator Jim Carruthers in the background.

IMAG0339

And a quick shot of the front, sans the tap handles, faucets, drip trays and glass rinser. More pictures of a finished product to follow, or find some rough ones buried in pictures of Big Brew Day from a few weeks ago, where the booth took it’s first test run.

IMAG0340

But, camaraderie aside, the best part of the night was the test run of Manayunk Brewery’s first ever canned product! Evan brought over a batch that was literally canned a few hours before we cracked them, possibly becoming the first ever party outside of the Brewery to enjoy canned beers from Manayunk. My choice -Monk from the ‘Yunk, a Belgian Triple that comes in at over 9% ABV, and was delicious.

AHA Big Brew Day 2012 Flashback

Posted in Brewing with tags , on April 26, 2013 by Verge

all photos courtesy and copyright 2012 Larry Wagstaff

How to Convert a Kegerator to Dispense Home Brew from Corny Kegs

Posted in Brewing, Brewing and Kegging Step-By-Step Instructions with tags on June 26, 2012 by Verge

Working at Keg & Barrel Homebrew Supply, I have many people inquire about the next step in home brew bottling…Kegging.  Fed up with the constant sanitizing, bottling, capping, and waiting the two-three weeks it takes to “bottle-condition” (aka carbonate), many homebrewers turn to Kegging their beer.

And why wouldn’t we?  You have exactly one container to clean and sanitize instead of scores, one lid to put on, only a few hours, instead of weeks, before you can enjoy a carbonated beer (more on that in another column), and possibly the most bad-ass aspect… home brew on tap in your bar.  (When liquor is the center of attention instead of the TV, it’s no longer a Family Room)

Kegging is great, but a traditional Kegerator comes with the type of coupler to tap a standard, domestic, “D” style keg.  How can you convert your system to accommodate your new “Corny Keg” system?  Well, quite easily, and cheaply, in fact. Here’s what you’ll need

Pliers

Scissors

Flat head screwdriver

2x swivel set (either two 3/16″ inch, or one 3/16″ & one 5/16″)

2x tail piece to Male thread adapters

Yep! If you already own a Corny Keg and the taps that fit on the posts, this is literally all you need to convert your kegging system into a dual purpose server. Mind you, you’ll need the Corny taps( whether your keg is pin-lock or ball-lock) that have a MPT (male pipe threaded) tip, not a barbed tip, so make sure you ask for that at your Homebrew Store.

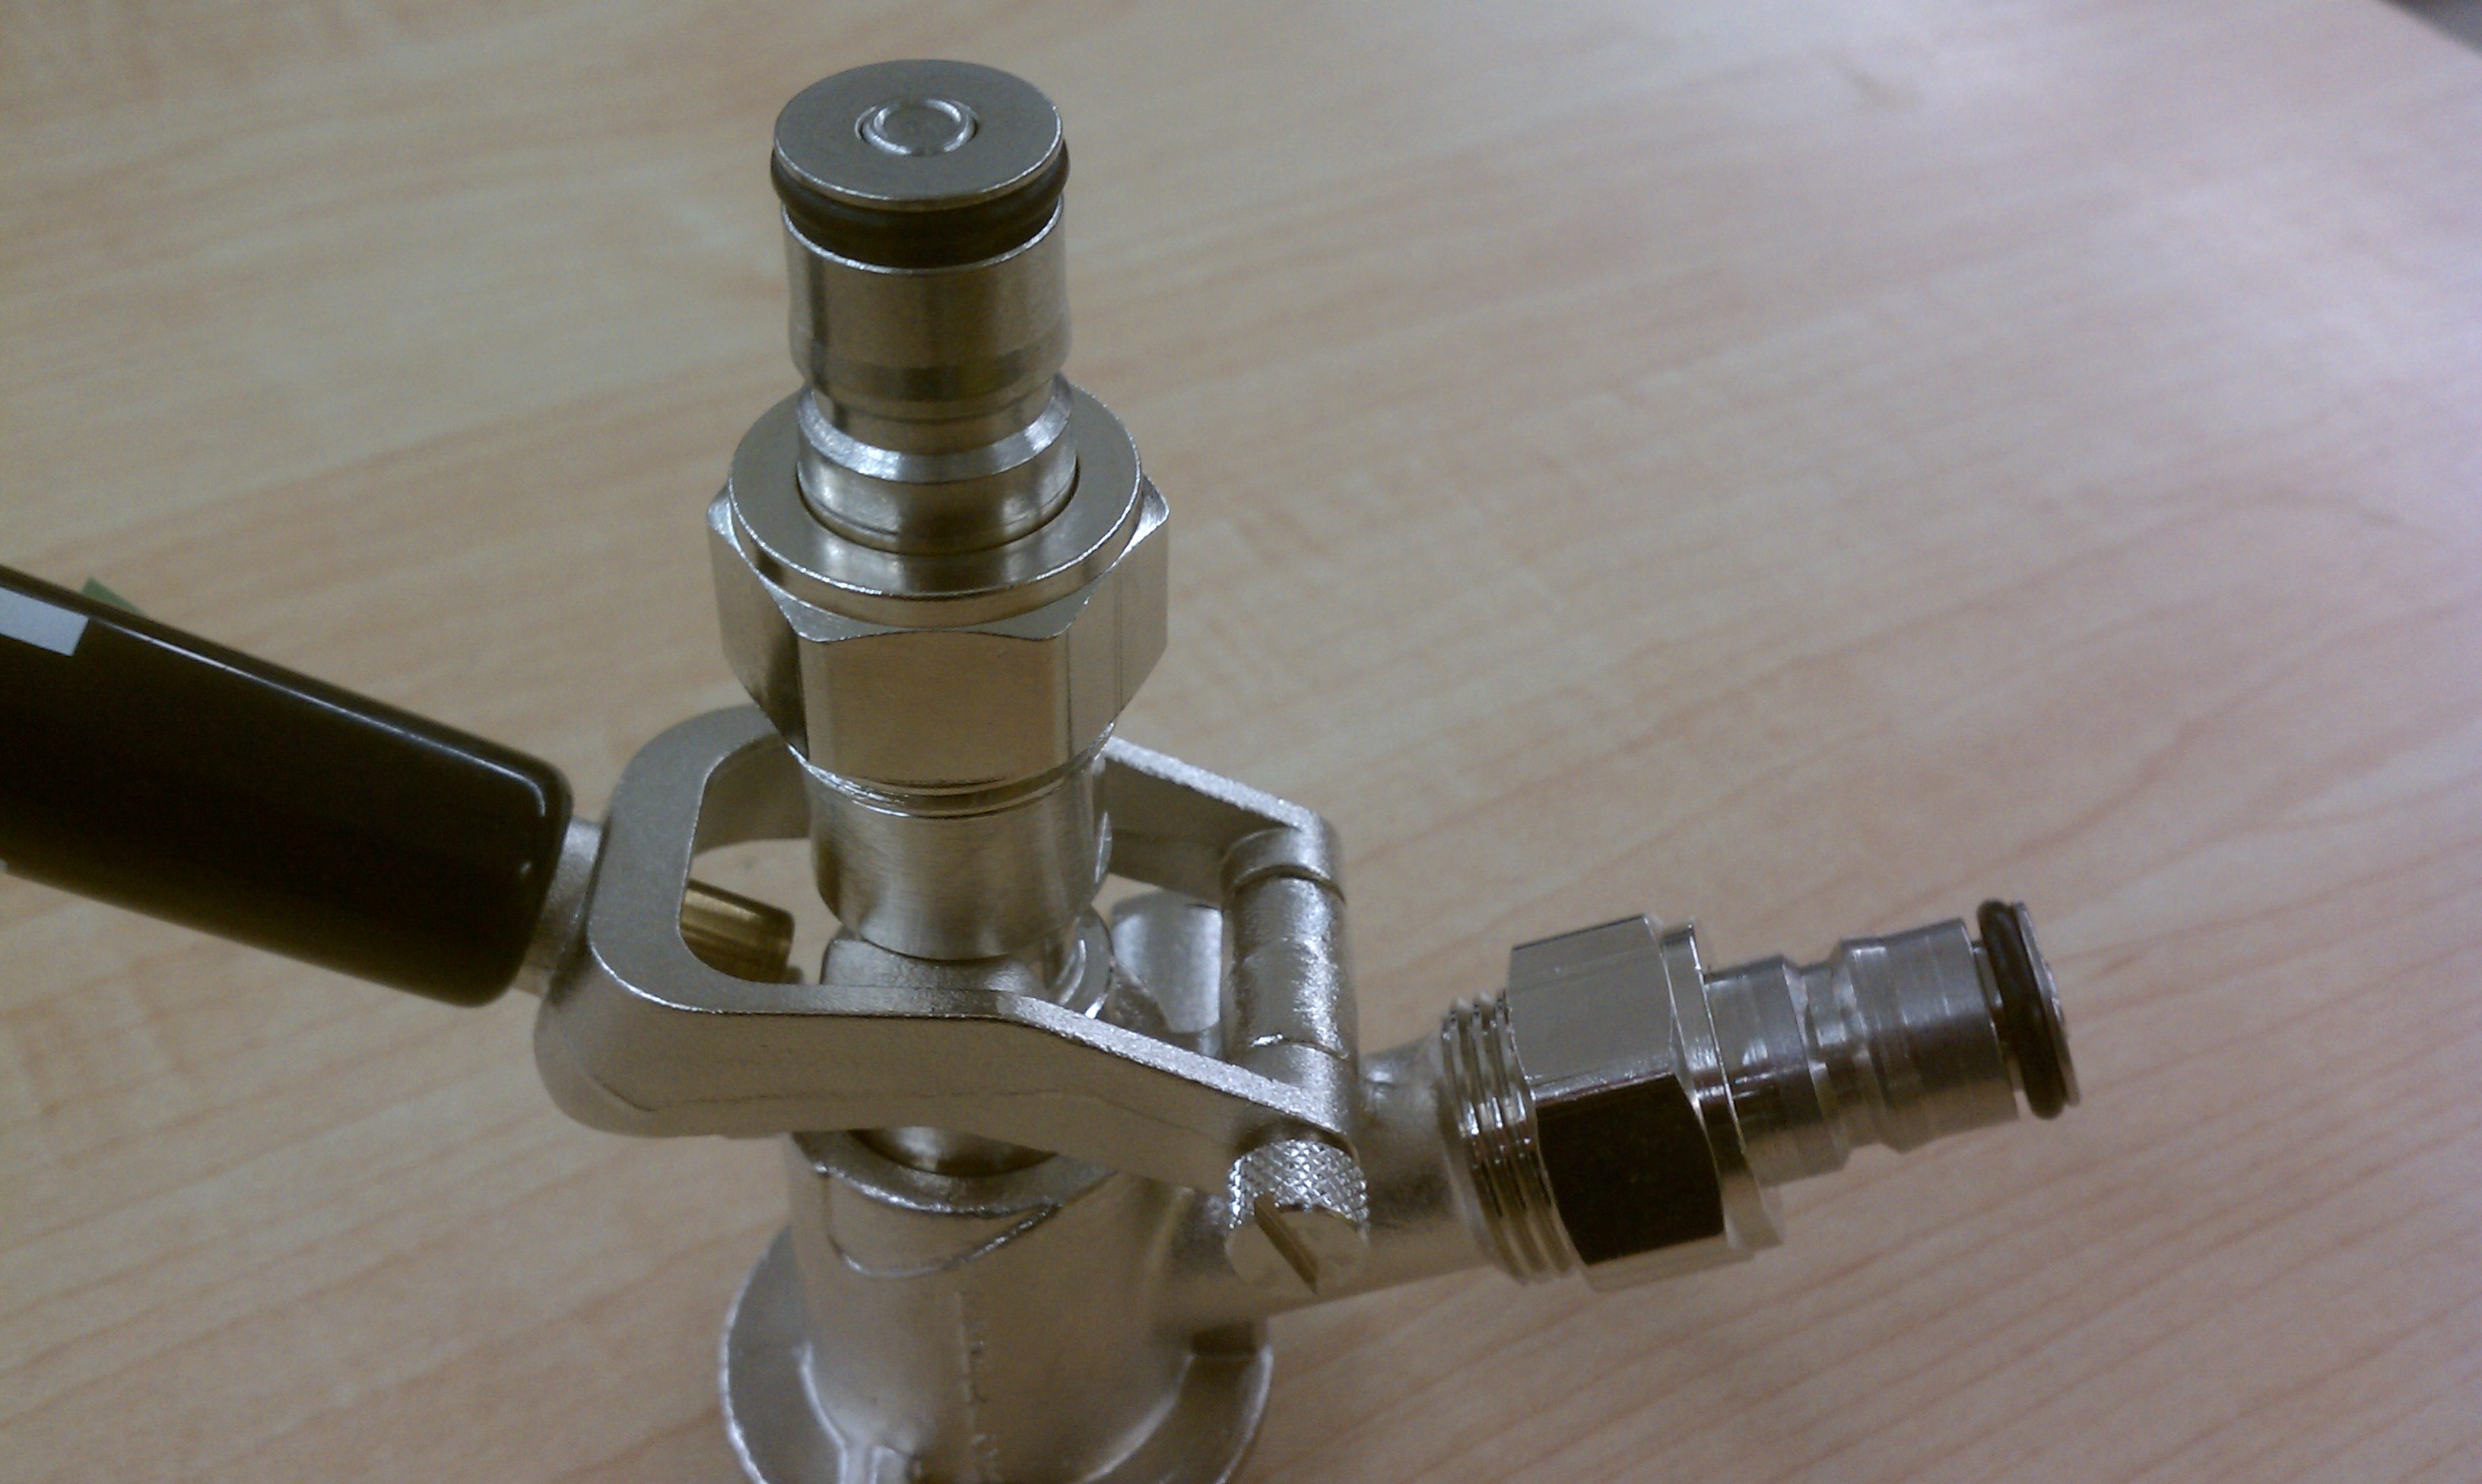
Your Kegerator “coupler” probably looks similar to this. The air line comes in from the side, and the beer is dispensed from the top. The lines on this one are clamped with screw clamps. Even if yours has crimp clamps, no worries. You won’t have to pry them with pliers.

Simply take your scissors and cut the lines near the coupler. Before cutting your air supply line, make sure your regulator is shut off, and the CO2 tank is closed. If you have screw clamps, remove them and save for later.

Now, unscrew the two nuts holding the old tail pieces to the coupler. Under the beer supply at the top, you’ll find a rubber gasket, and under the air supply, you’ll find a check valve. Keep both of those, as well as the nuts. The tubing and the old tail pieces you can either throw out, or slice off the tubing and save for spare parts. You won’t need them anymore for this tutorial.

You’ll now have two open tubes going to your CO2 tank, and your tower and faucet. Insert the swivel set through it’s corresponding nut and into the tubing. Remember to slide the screw clamp over the tubing first so that you can tighten it onto the barb once inserted into the tubing.

Make sure you leave a little space between the tubing and the nut on the swivel set. This is what allows you to be able to tighten the nut without twisting the hose. It’s called “swivel” for a reason.

With those secured in place, simply screw them tight to the taps on your Corny keg and you’re ready to dispense your favorite beverage.

Replace the check valve and gasket on the coupler, and attach the new MPT tailpieces to the coupler. You’re now ready to switch back to the old, traditional coupler when you run out of home brew and want to drink a Miller Lite.

Simply unscrew the air and beer lines from the Corny taps and attach them to the “D” coupler. Tap your favorite brew!

UPDATE!!!  Here's another way to do it, if your homebrew store carries the parts.  You can get tailpieces that fit onto "D" sanke couplers that are Cornelius/homebrew keg posts.

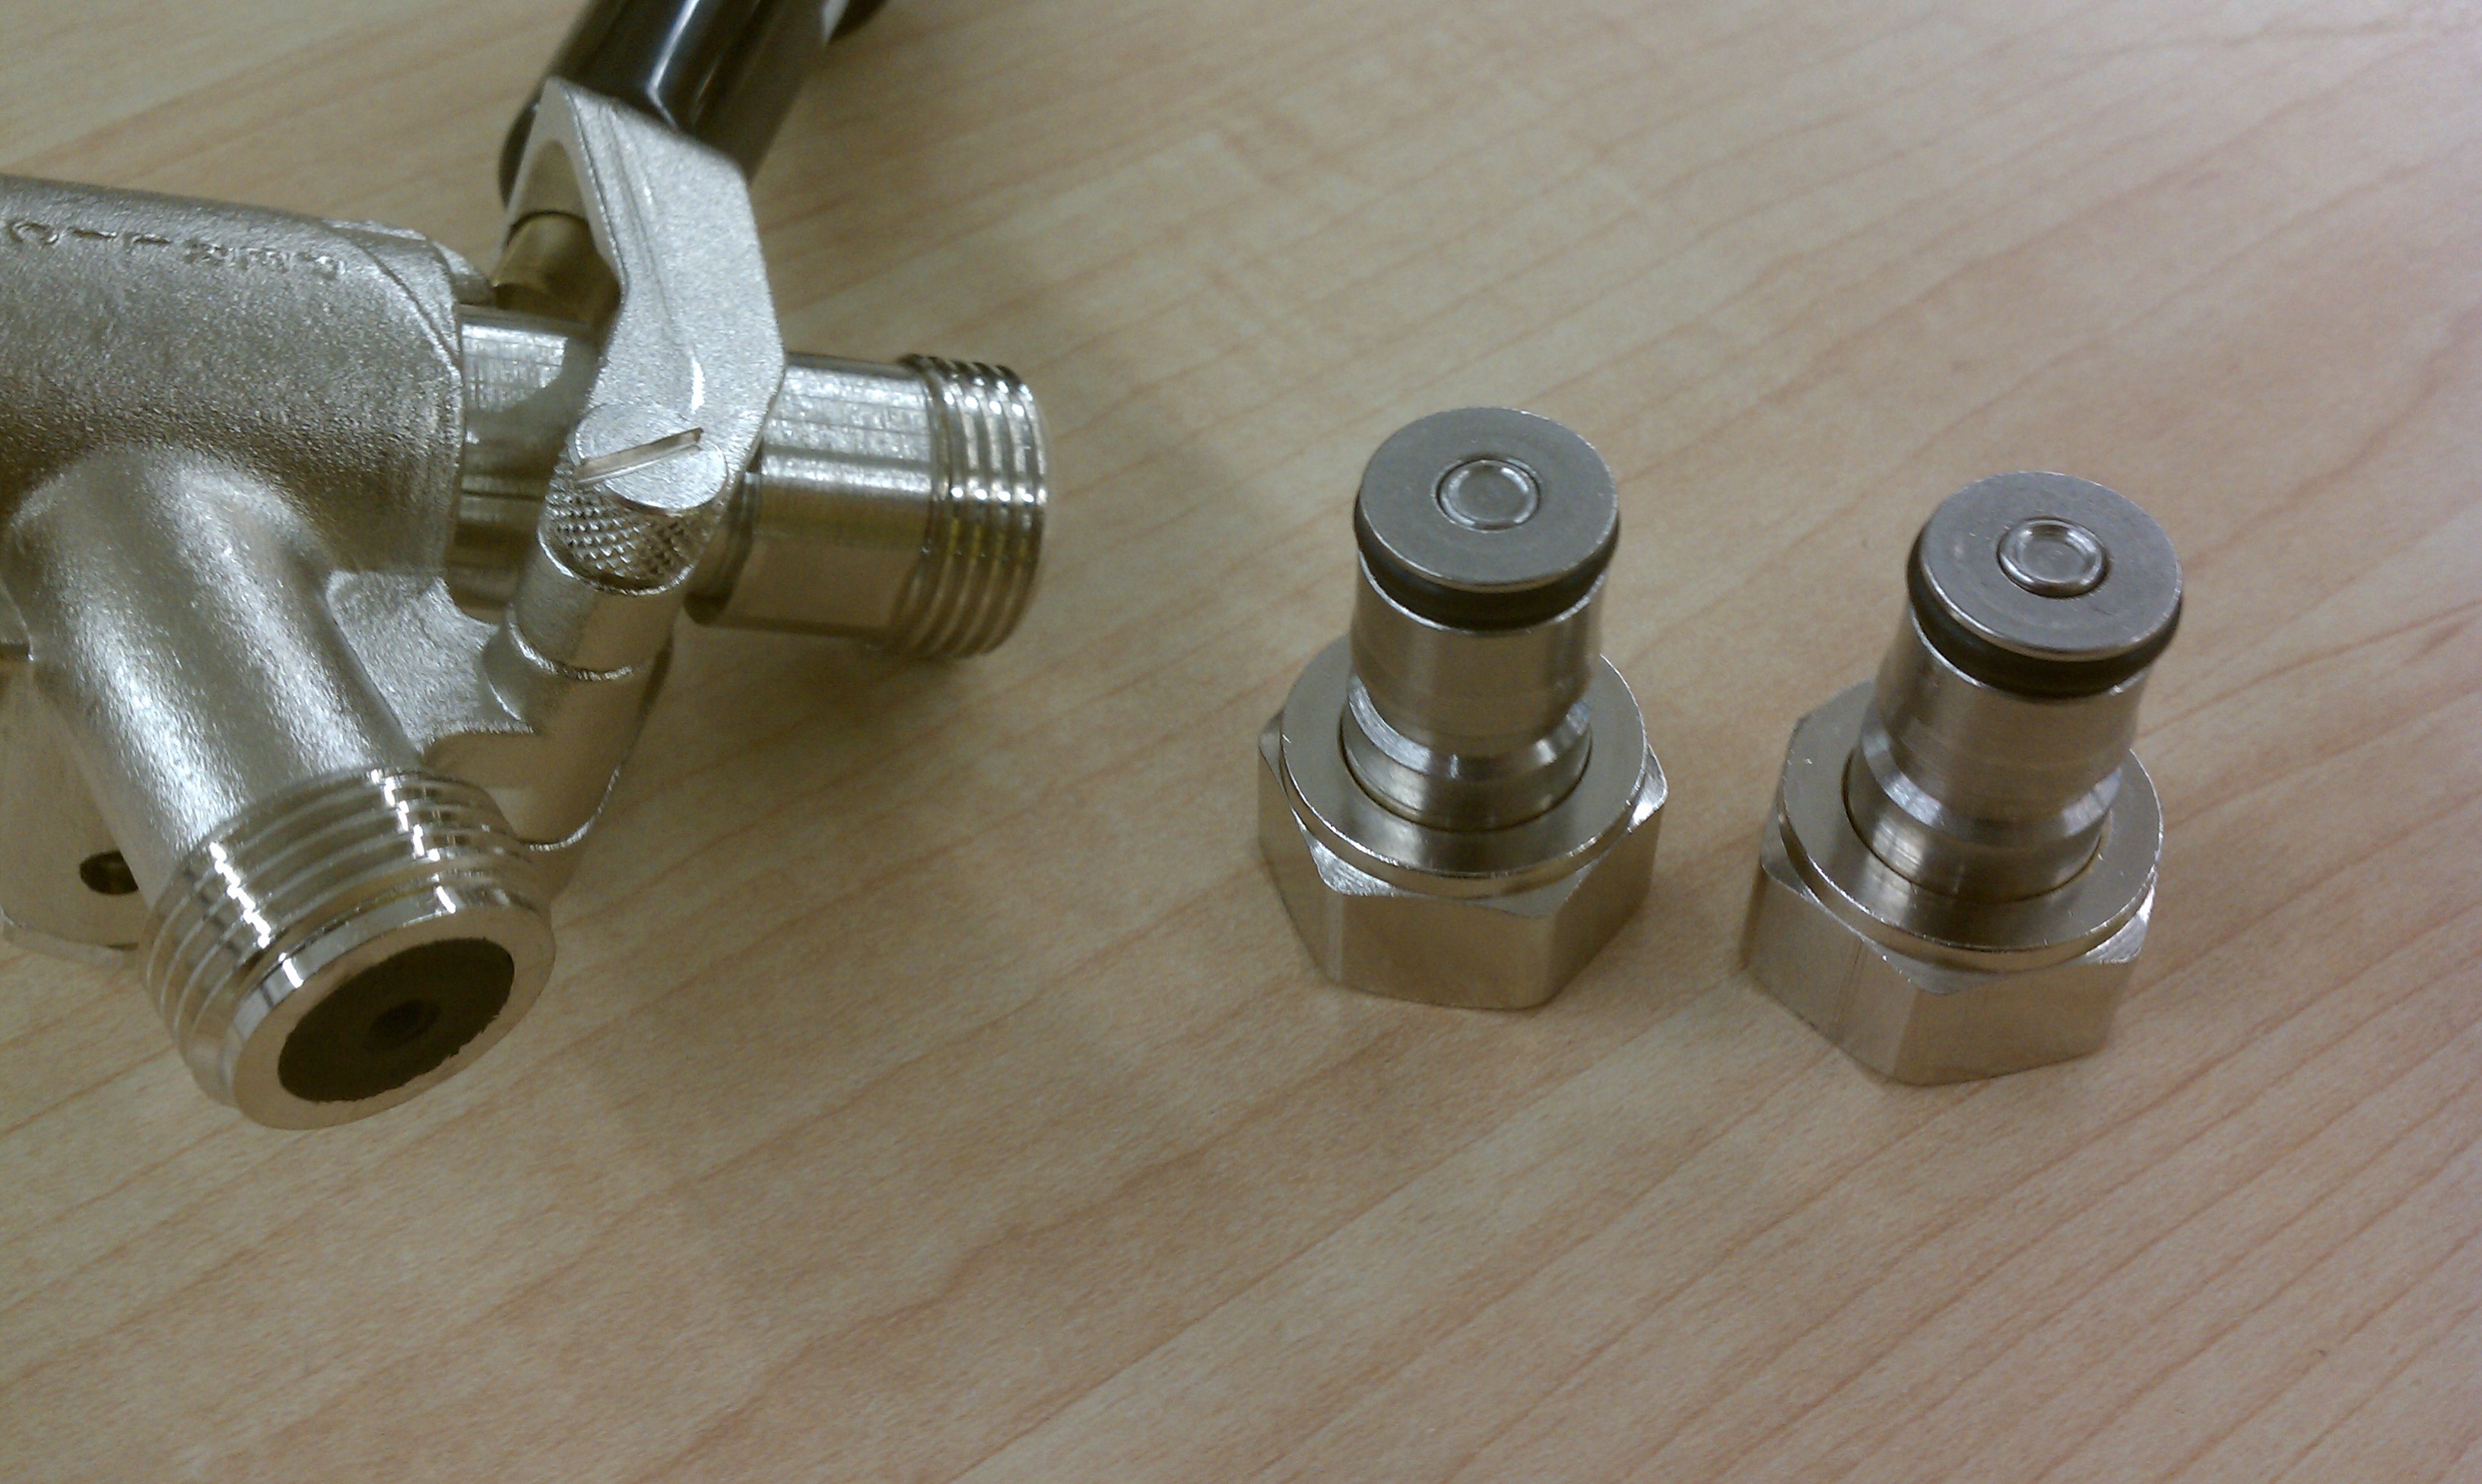
UPDATE!!! Here’s another way to do it, if your home brew store carries the parts. You can get tailpieces that fit onto “D” Sanke couplers that are Cornelius/home brew keg posts.

once screwed on, you'd be able to simply leave your corny disconnects permanently attached to the beer and CO2 lines, and either connect them to a corny keg system, or right onto a regular keg coupler.

Once screwed on, you’d be able to simply leave your corny disconnects permanently attached to the beer and CO2 lines, and either connect them to a corny keg system, or right onto a regular keg coupler.

these posts cost around 40 bucks a set, not including the disconnects seen in this picture, but they save you from having to find a wrench when you want to convert back and forth, and save you a bunch of time as well.  The only advice I can give here is this:  I would still reccoment that you have threaded swivel sets on the beer  line, instead of a barb and clamp.  That way, when in come times to clean out the beer lines, you can simply unscrew the disconnect from the swivel set and run BLC through the lines.

these posts cost around 40 bucks a set, not including the disconnects seen in this picture, but they save you from having to find a wrench when you want to convert back and forth, and save you a bunch of time as well. The only advice I can give here is this: I would still recommend that you have threaded swivel sets on the beer line, instead of a barb and clamp. That way, when in come times to clean out the beer lines, you can simply unscrew the disconnect from the swivel set and run BLC through the lines.

THIS POST HAS BEEN, BY FAR, THE MOST READ POST ON MY BLOG.  PLEASE LEAVE A COMMENT TO LET ME KNOW IF MY ADVICE WORKED FOR YOU, AND IF IT WAS HELPFUL.  THANKS AND CHEERS!

%d bloggers like this: